← Back to Projects
Virtual Thermostat Controller
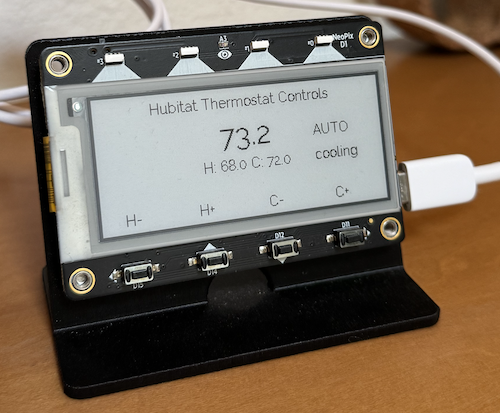
Solving over-engineering with even more over-engineering.
We live in a two-story house, with the living room and kitchen on the first floor and the bedrooms (two of which serve as my wife’s and my offices) on the second. The thermostat that controls the air conditioning is located in the middle of the second floor underneath a skylight, which is reliably the warmest spot in the house and a couple degrees warmer than the temperature downstairs. This means that if it’s comfortable upstairs, it can be pretty chilly downstairs. This makes controlling the temperature throughout the day a nuisance, since we tend to spend much of the day and all night upstairs and our evenings and mornings downstairs.
Luckily, our house is “smart”, so this is an easily solvable problem. A lot of our household devices, including the thermostat, can be controlled by the Hubitat controller in my office. That same Hubitat controller can also communicate with sensors and use those sensors for automation.
In this case, I placed a Zooz ZSE44 temperature sensor in the living room and used the built-in Thermostat Controller app to create a virtual thermostat whose temperature is a weighted average of the temperature from the thermostat and the temperature sensor. The weights of that weighted average change based on the time of day (which Hubitat abstracts behind modes), and the virtual thermostat controls the physical one by messing with its “auto” mode set points.
This approach has worked really well, but it has one big drawback: the physical thermostat’s controls are now pretty much useless at controlling the temperature, and the temperature it displays doesn’t always correspond to the virtual thermostat’s.
Of course, all of this is visible and controllable from my phone, but having to take out my phone and open the Hubitat app every time I want to adjust the temperature is obnoxious, especially when I’m right next to the physical thermostat. I could have used a cheap tablet in kiosk mode to display the virtual thermostat controls, but RAMmageddon means that cheap tablets aren’t really that cheap anymore. Also, it’d be one more computer to keep patched and updated, and I’ve got plenty of those.
Handily, I had an Adafruit MagTag lying around that I had already printed a desktop stand for. The MagTag’s e-paper display and its four onboard buttons made it a great fit for this project. The display is easy to read in bright light, and there are just enough buttons to control both heating and cooling setpoints.
The CircuitPython code is pretty straightforward. It uses Hubitat’s Maker API to retrieve and modify the state of the virtual thermostat, and sends state updates when you press the buttons.
I didn’t do anything fancy with sleeping the MagTag between button presses or screen refreshes, since I knew that it was going to be right next to an outlet and I wanted HTTP requests to the API to be snappy.
To prevent unnecessary wear on the screen, it waits a few seconds after the last button press before it refreshes. If you’re not interacting with the controller, its screen refreshes every couple minutes to present a reasonably up-to-date picture of the thermostat’s state.