← Back to Projects
Derpy and Sussie (Halloween)
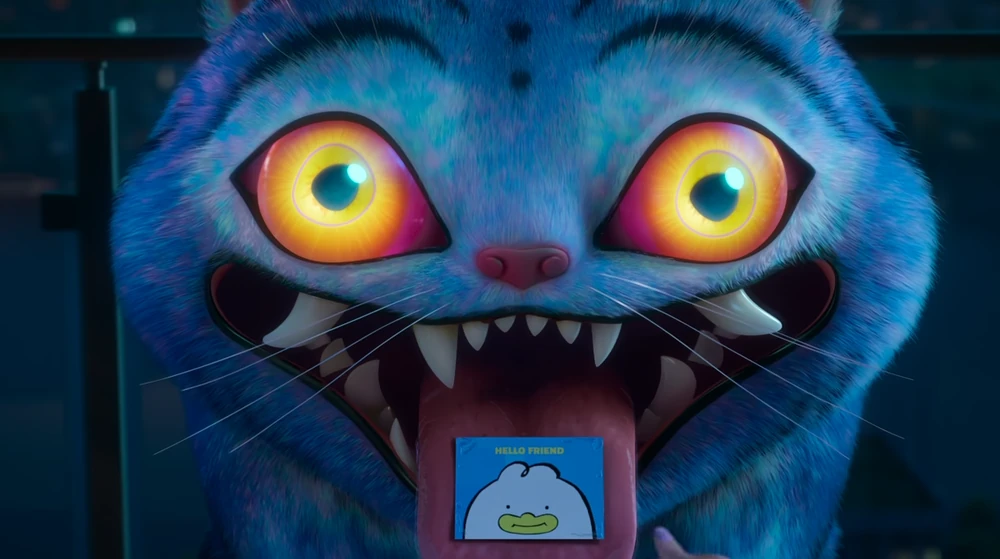
My wife and I were looking for a couple’s costume idea for Halloween 2025, and were feeling pretty indecisive. Then she watched KPop Demon Hunters with a friend, and we both fell in love with the film’s supernatural tiger and magpie.

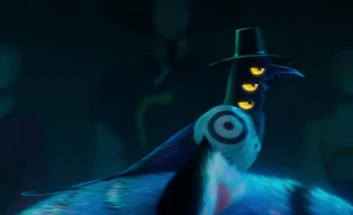
They are never given explicit names in the film, but director Maggie Kang later confirmed on X that the tiger’s name is Derpy (because … I mean, look at it) and the magpie’s name is Sussie (because it’s “always giving sus eyes”). We decided that she would be Sussie and that I would be Derpy.
Building Sussie
Sussie’s defining feature is its eyes (all six of them). I had recently come across Uncanny Eyes, a microcontroller program that displays a pair of eyes on two round TFT LCD displays that move around and blink. I thought it would be cool to adapt the Uncanny Eyes program to give the Sussie costume eyes that move around. This would turn out to be one of the harder parts of the project.
Software
I wanted to use a microcontroller that I already had for this project, and figured that the Teensy 4.1 would have enough compute power to handle powering the eyes. Conveniently for me, @chrismiller had already done all the hard work to port the Uncanny Eyes demo to Teensy microcontrollers (as TeensyEyes), and had also created mounting brackets for the displays and a framework for defining custom pupil and eyelid shapes. Without all of his hard work being open source, this project would have never gotten done in time.
The original TeensyEyes code was meant to work with two eyes. It wasn’t too hard to set up additional eye controllers in software, but I found that the Teensy couldn’t keep up with animating all six eyes at once. Thankfully, Sussie has eyes on the sides of its head rather than the front, so you only really see one of its eye triplets at a time. Each eye is also a mirror image of the other two. As a result, you can control six eyes with just two eye controllers if you’re willing to cheat and make multiple eyes display the same image.
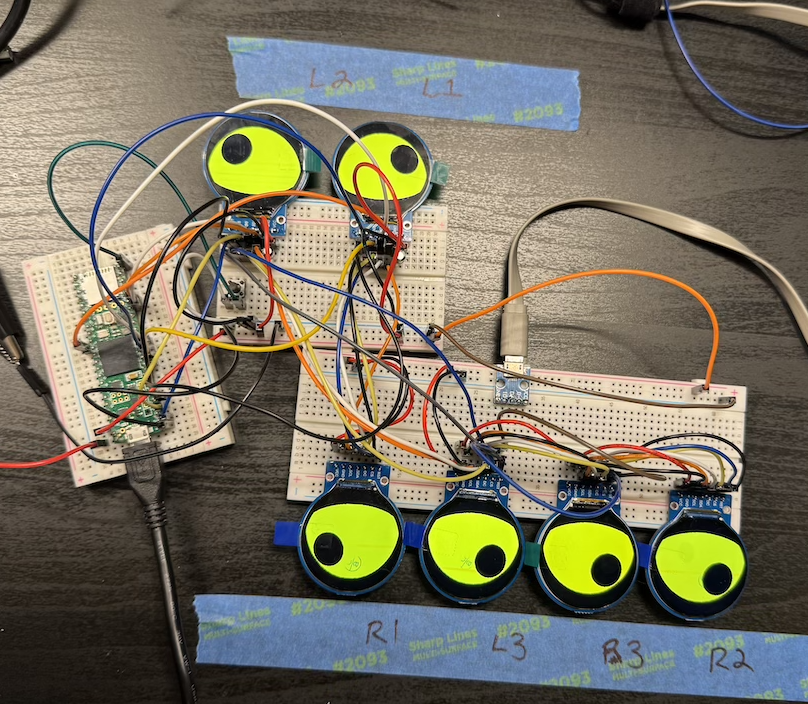
Testing the eye displays.
The top eyes on both sides of the mask are daisy-chained together and controlled by the “left” eye controller, and the bottom four eyes are daisy-chained together and controlled by the “right” eye controller. If you could look at both sides of the mask at the same time, Sussie would look a little wall-eyed and its pupils would track in different directions, but since you can only see one set of eyes at a time, it doesn’t really matter.
The Mask
The first step was figuring out the physical structure of the mask. I don’t have any experience in 3D sculpting and was short on time, so I started with this plague doctor mask model from Printables and squashed, stretched, and sliced it with a combination of Blender and TinkerCAD until it looked like I wanted. This took several iterations of design and printing, both to adjust the fit and to reposition the eyes so that they sat roughly co-planar with the mask’s inner surface.
The mask printed in three pieces: two halves of the face, and the beak. Those pieces went together with some superglue and Bondo, and were then primed and painted with black spray paint.
I definitely rushed the finishing on the plastic portions of the mask. The seam between the beak and the face is really obvious under bright light, and the Bondo ended up being much shinier than the PLA when painted. Luckily, most of our parties were in pretty dark locations, and it’s not nearly as noticeable at night. If I had it to do over again, I’d definitely spend a lot more time with filler primer and sandpaper before painting it.
The mask has some webbing that straps in the back. I ended up stitching that together by hand, and it seems to have held together pretty well. The webbing helps keep the mask attached to your face, but the mask itself is still pretty front-heavy. At the last minute, we decided to put a strip of hook-and-loop on the very top of the mask, with the loop side on the mask and the hook side on the costume’s hood. That hood took enough of the weight that the mask was reasonably comfortable to wear for long periods. We also added a foam chin rest to move the mask away from my wife’s neck.
We covered the eye holes in the mask with stocking material stretched over some thick armature wire and hot-glued in place. We had to use multiple layers to make it sufficiently opaque, but that also made it pretty difficult to see in there, especially at night.
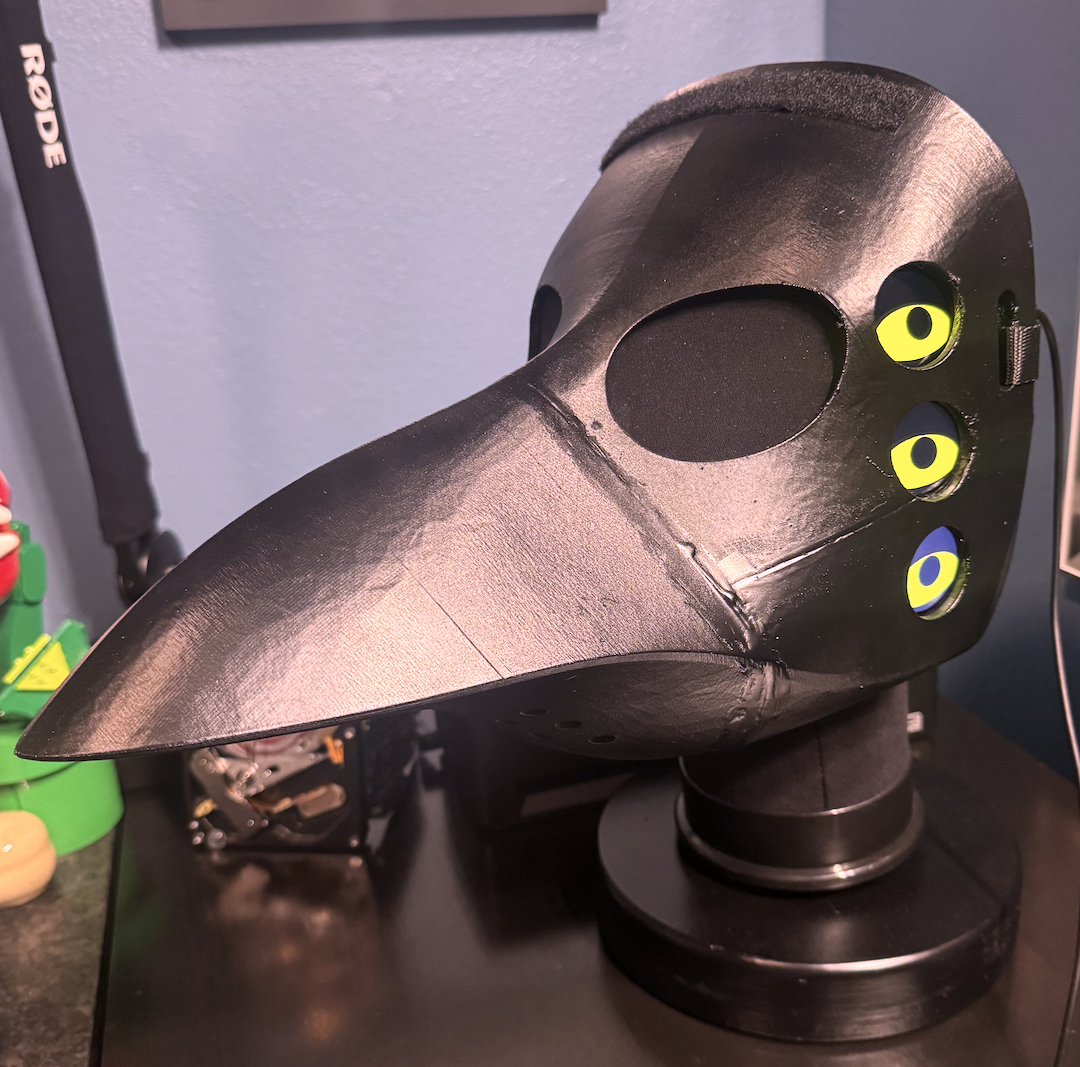
The finished product, powered on. In this photo, the mask is attached to a stand I built in early 2026, which consists of a mannequin head that’s mounted to a 5 pound weight wrapped in wood. The electronics are being powered externally here for convenience; when the costume was being worn, everything was powered by a battery inside the beak.
The Electronics
I wanted to keep the mask entirely self-contained so that it would be relatively easy to take on and off, since we were going to several different Halloween events and would have to take these costumes on and off a few times. Keeping the mask self-contained meant storing both the electronics and a battery pack in the mask’s beak. While the beak itself is reasonably large, its interior space is pretty cramped because the beak gets narrower quickly as you get further away from the face, so I didn’t have a ton of space to work with.
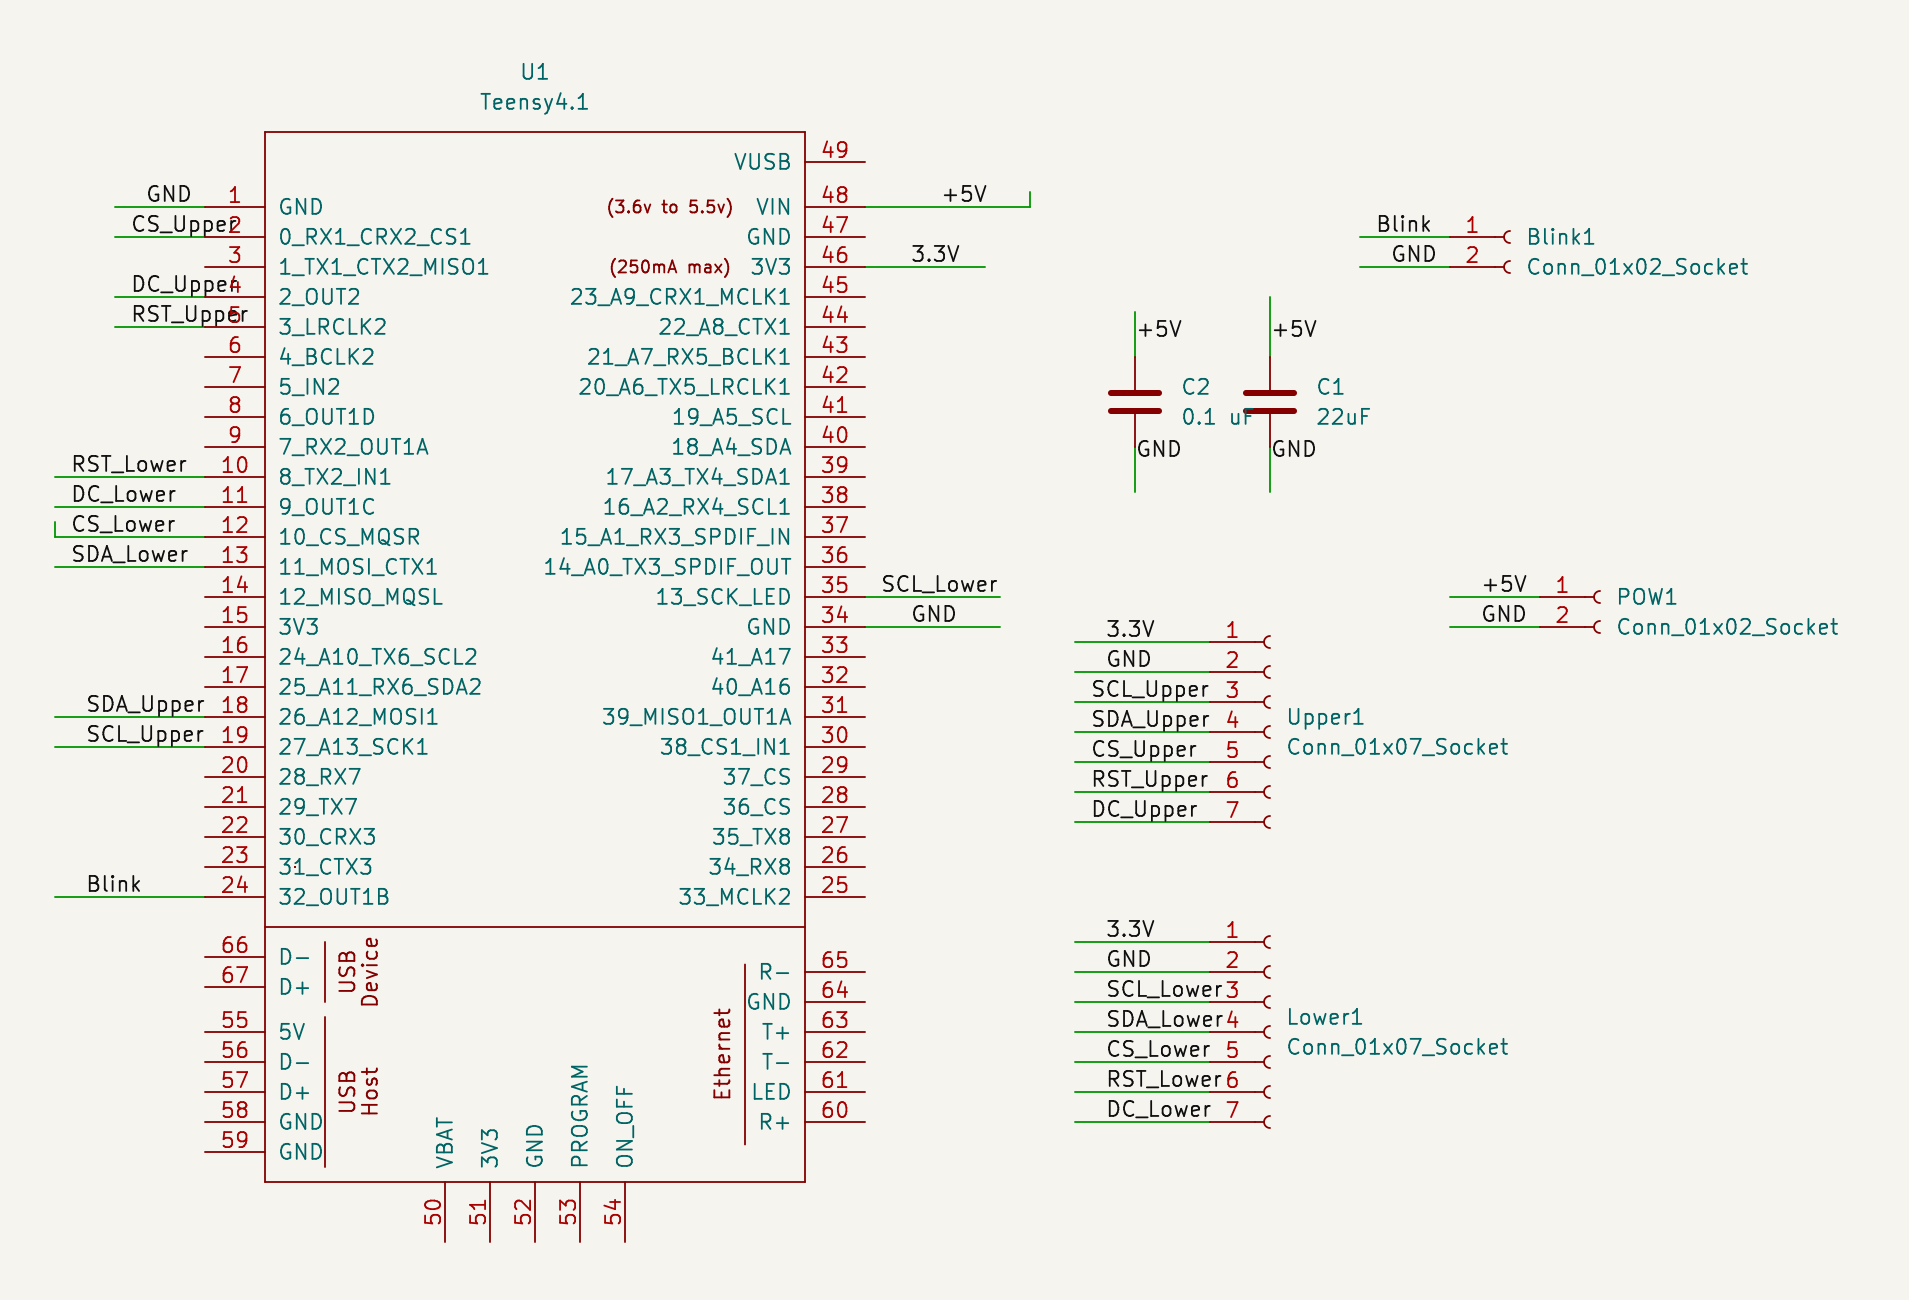
The schematic for the eye controller.
I made a bet early on that a fabricated PCB would likely be more compact than anything I could put together by hand, and would also be faster to assemble than a hand-soldered protoboard. As soon as I had the eyes working on a breadboard, I quickly threw together a PCB in KiCAD and sent it to OSH Park for printing. This is only the second PCB I’ve ever had fabricated, so waiting to see if I got all the routes right on the first try was a bit of a nail-biter. It was doubly stressful because I only really had time for one attempt. Luckily, the design was pretty simple and everything worked on the first try.
I broke out the “blink” pin to a separate terminal even though I hadn’t tested it on a breadboard first, just to future-proof myself a little bit. I didn’t end up wiring up a blink button in the final costume because it ended up behaved really strangely during initial testing and I didn’t have time to debug it.
This YouTube video from BMonster Laboratory was a valuable resource for figuring out how to wire the Teensy to the displays, particularly its guidance on using filter capacitors for power.
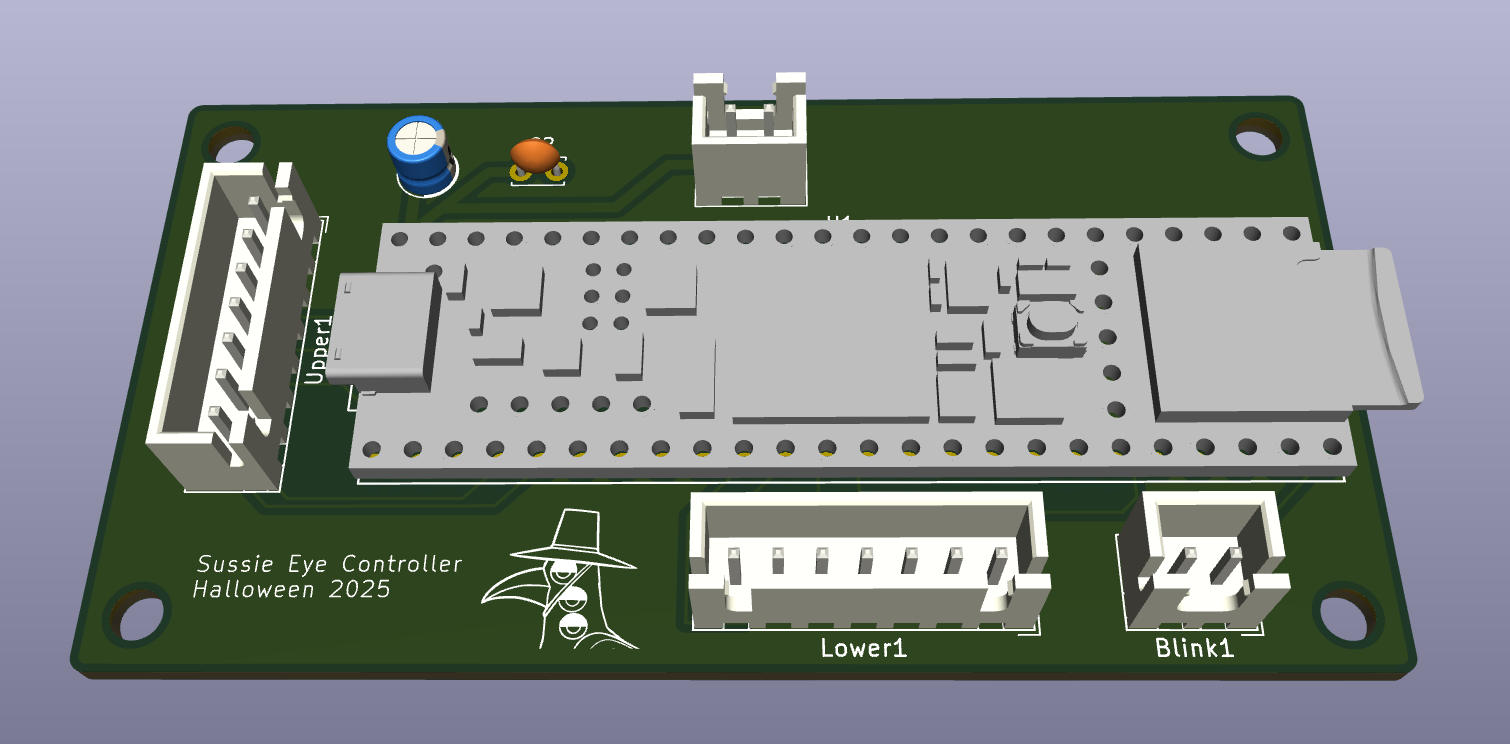
A 3D model of the PCB, courtesy of KiCAD.
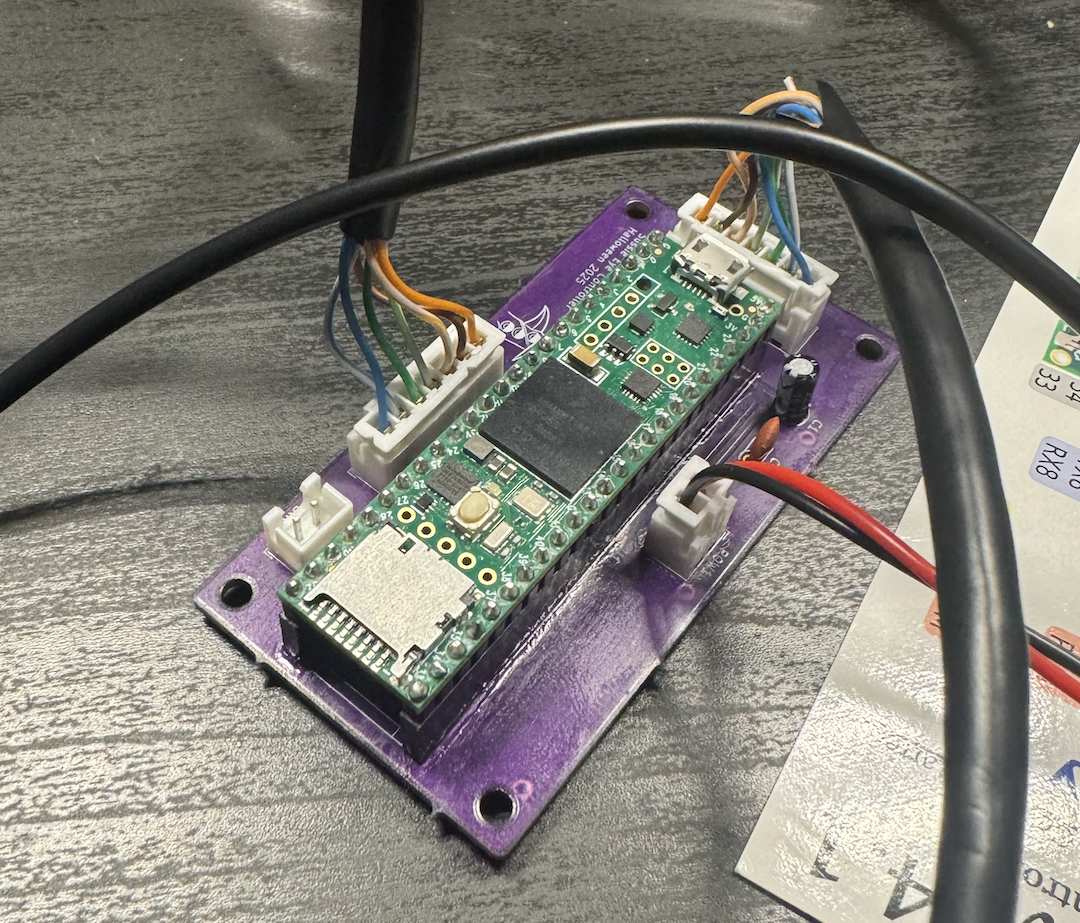
The real thing, assembled.
For the control board’s housing, I started with an existing parametric 3D-printed box design in Fusion 360, then added screw posts on the bottom of the box and cutouts in the lid for the wires. This gave the PCB some protection without adding too much bulk.
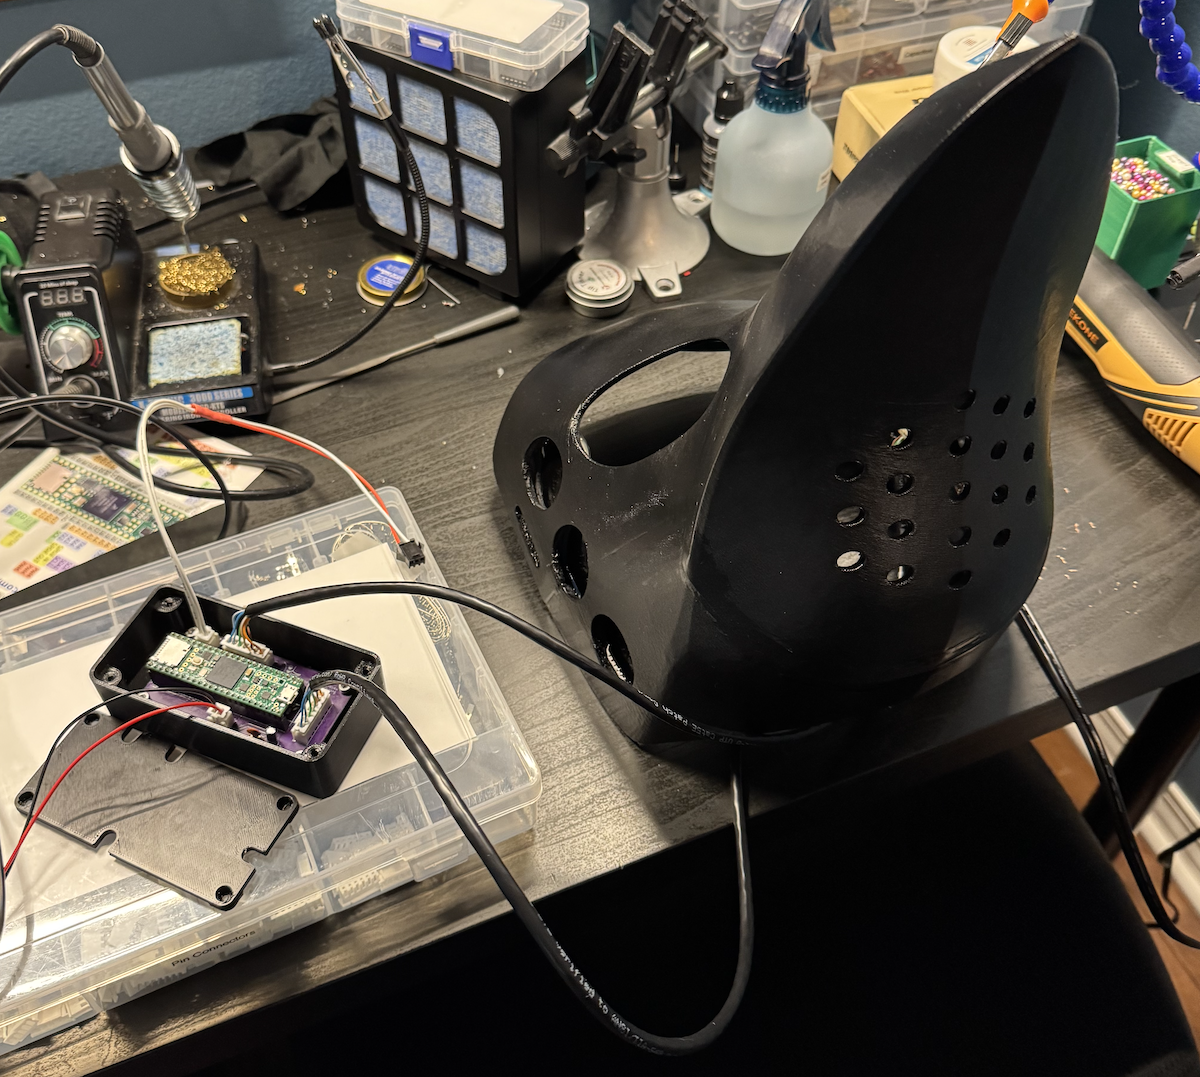
The mask with its complete control box removed during integration testing.
Another challenge with the electronics was wiring the displays together inside of the mask. Each display has 7 pins, and some of those pins need to be daisy-chained between multiple displays. That adds up to a lot of wires, all of which had to fit in the gap between the surface of the mask and my wife’s face. The wires also had to be protected somehow to avoid getting snagged on anything when the mask was being taken on and off.
I puzzled over how to do this for a few days, trying a number of different approaches that didn’t really work. At an area maker meetup, someone suggested that I use Ethernet cables. This turned out to be a huge time-saver. Ethernet can carry far more power than the displays needed, and the cable’s 8 wires are already inside of an outer cladding that prevents them from getting snagged.
The displays I bought came pre-soldered with 7-pin Dupont connectors. To daisy-chain the displays together, each connector pin has to be soldered to multiple very thin wires. Soldering directly to the Dupont connectors was fiddly and error-prone, so I opted to attach each display to a small piece of stripboard and solder the wires to the appropriate strips. The wires were secured to the mask’s interior with hot glue. More hot glue was applied to the strip board to provide some strain relief for the wires and to prevent the connectors or wires from poking my wife in the face.
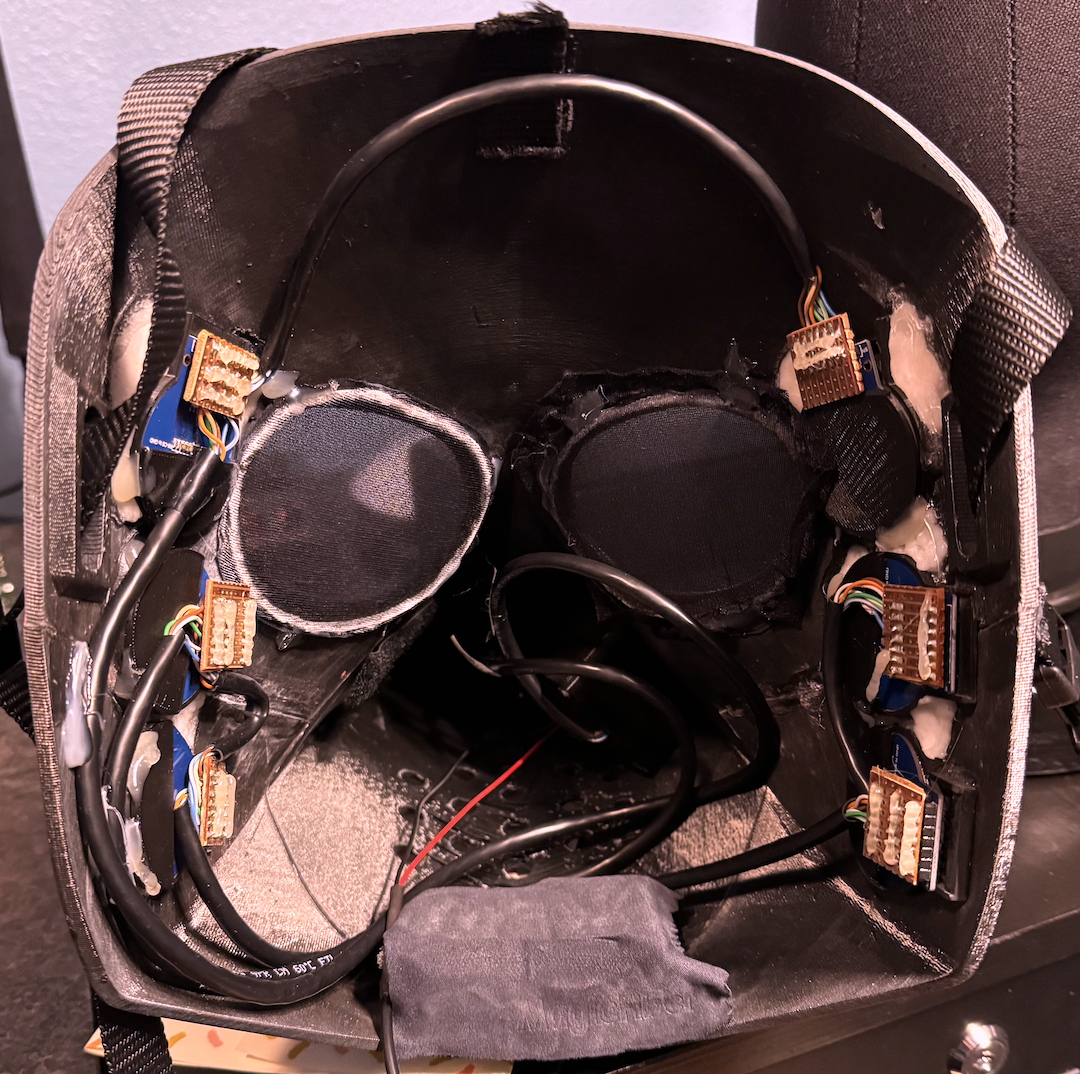
The mask’s interior. The cables leading into the beak were smooshed flat when it was being worn, and the USB power lead that comes out the bottom in this picture was connected to a USB power bank hidden in the beak.
The entire contraption was powered by a 10,000 mAh USB battery pack, which turned out to be massive overkill. The Teensy and all six displays only pull about 0.4 A total, giving us a total runtime of around 25 hours. I chose that particular battery because it was the most compact one I could find with a USB-A port; everything that was more compact was USB-C only, and I didn’t want to have to figure out how to wire power into a USB-C connector on a tight timeline. It was also easy to source an inline USB-A power switch that I could plug between the Teensy and the battery, which made it easy to switch the mask on and off.
Demo
This mask was by far the most complicated physical object I’ve built to date. It all came together in a really short period of time, I learned a ton making it, and I’m really pleased with the final result.
The Rest of the Costume
Sussie’s body started as a “Classy Crow” costume. The costume had a hood with embroidered eyes and a stuffed beak on it. That would obviously be redundant with the mask, so my wife removed the beak and hemmed the hood to hide the eyes. She then cut out some felt and fabric glued it to a white romper to form the white parts of Sussie’s body.
We had a hell of a time finding the hat that Sussie wears (which is a traditional Korean wide-brimmed hat called a gat), since everyone and their mother wanted the same hat to dress up as the film’s demon boy band. We ended up finding a cheap knockoff on Amazon that worked well enough. I had toyed with the idea of storing the electronics for the mask in the hat, but the fact that the only hat we could find was made of a translucent mesh kind of nixed that idea.
We were originally going to cut up some cheap pleather boots so that they had three toes each (get it? like a bird?) but ultimately decided to punt on that idea due to time.
Building Derpy
Derpy is also defined by its eyes, mainly by the fact that they’re large, they’re very derpy, and they glow.
My wife had the idea to ring a pair of cheap sunglasses in LED wire to simulate that glowing effect. I designed a simple armature in Fusion that the wire could be glued onto, and she handled the meticulous work of gluing LED wires to armatures and armatures to lenses. She then took the lenses out of a pair of children’s sunglasses and glued them to the larger lenses to serve as Derpy’s pupils. The LED wires ran back along the arms of the glasses and down my back to a battery pack in the pocket of my shorts.
Derpy’s body began life as a Cookie Monster onesie. My wife removed Cookie Monster’s googley eyes from the onesie’s hood (which was strangely sad?) and used strips of faux fur to re-create the patterns on Derpy’s pelt. Each strip of fur needed to be cut, shaped with scissors and an electric dog grooming shaver (shout out to Ragmop and Goose for the tip on that one), and fabric-glued to the onesie. She used hairspray to make the fur hold its shape and to keep the borders between the white and black fur strips crisp.
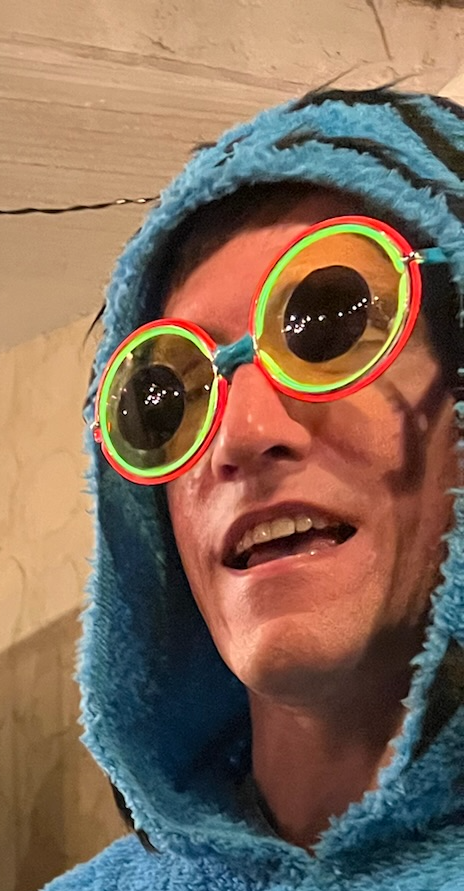
A close-up of the Derpy glasses.
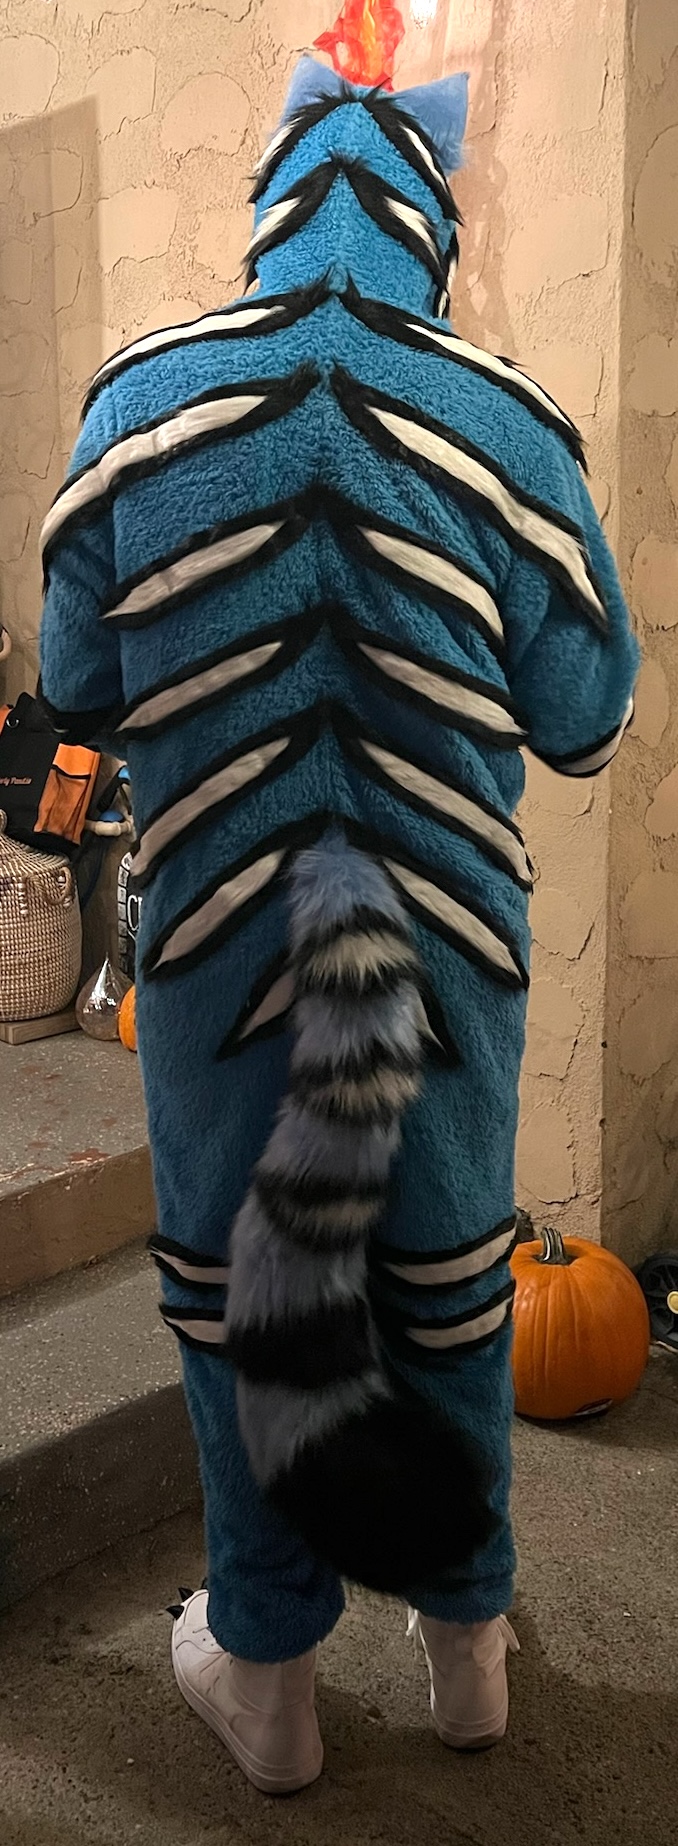
Showing off the stripes.
My shoes were white basketball shoes left over from a previous costume that I glued some 3D-printed claws to. We got Derpy’s ears and tail from an Etsy seller. I also wore fingerless cat paw gloves that my wife modified and sewed more of the same claws onto.
The Final Result
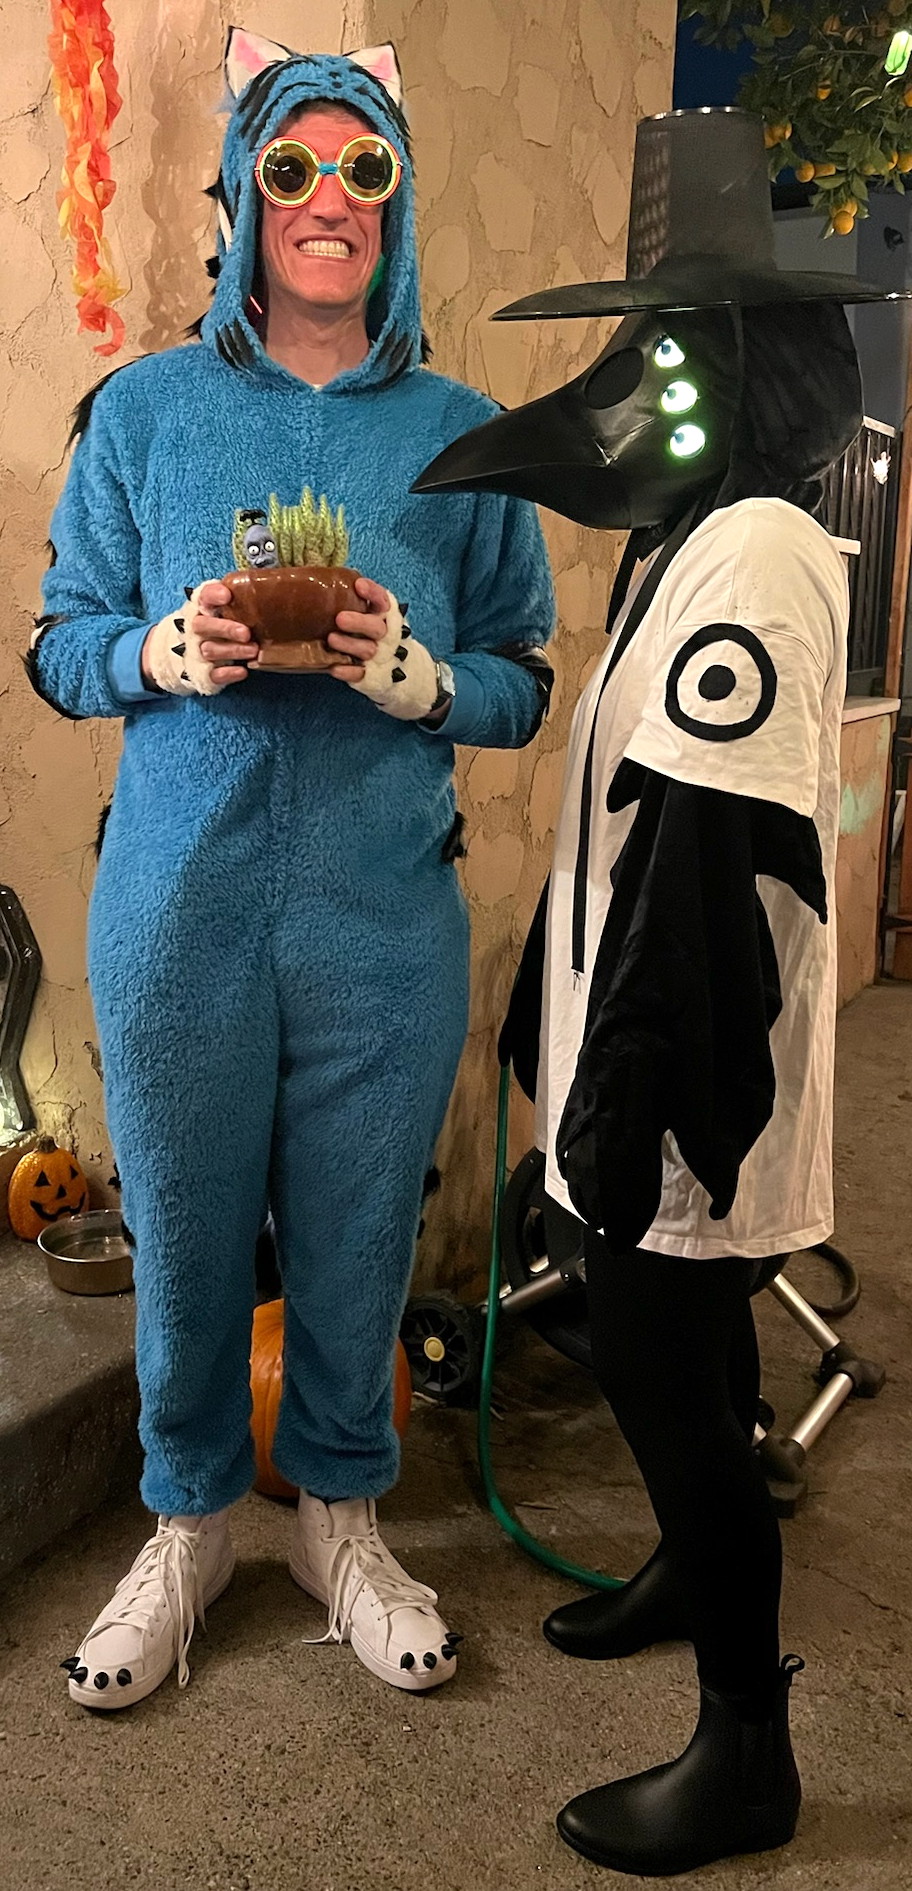
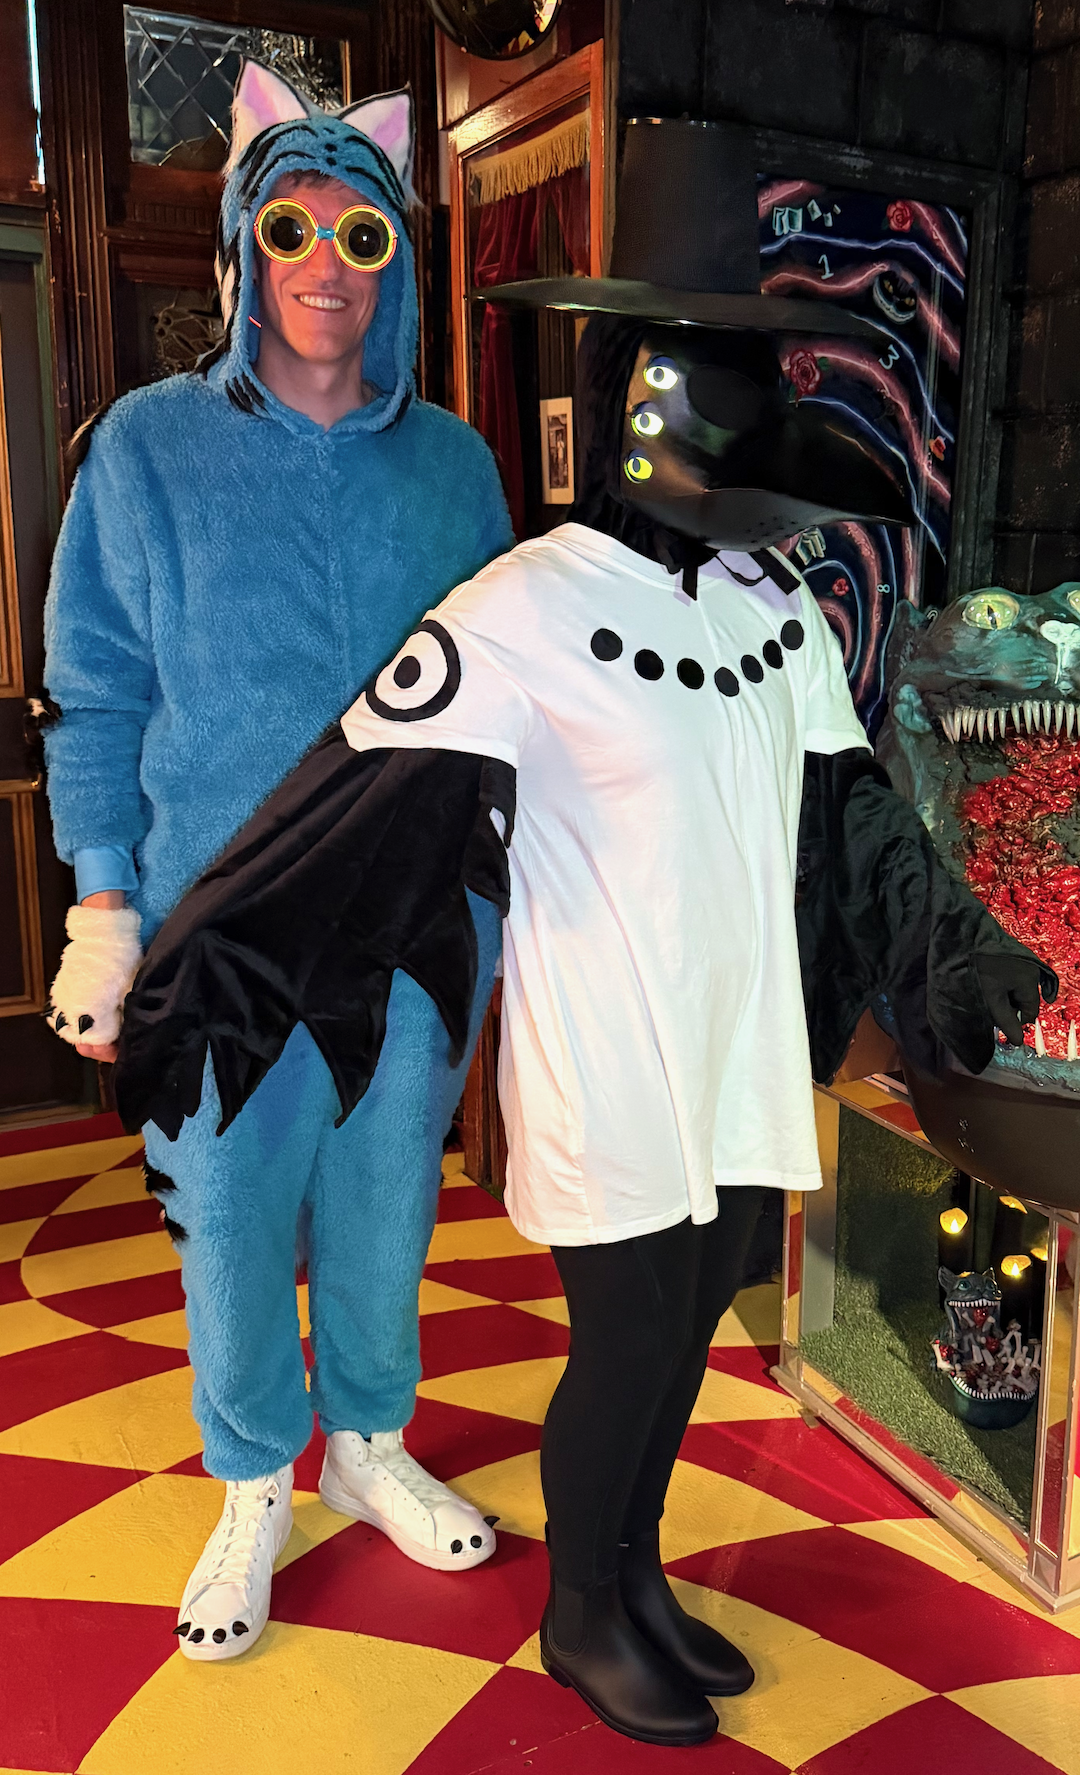
Putting these costumes together was a lot of work in a short period of time, but we were both really happy with how they turned out. This was also the first time that I’ve gotten to make part of a costume for my wife, which was pretty special.